
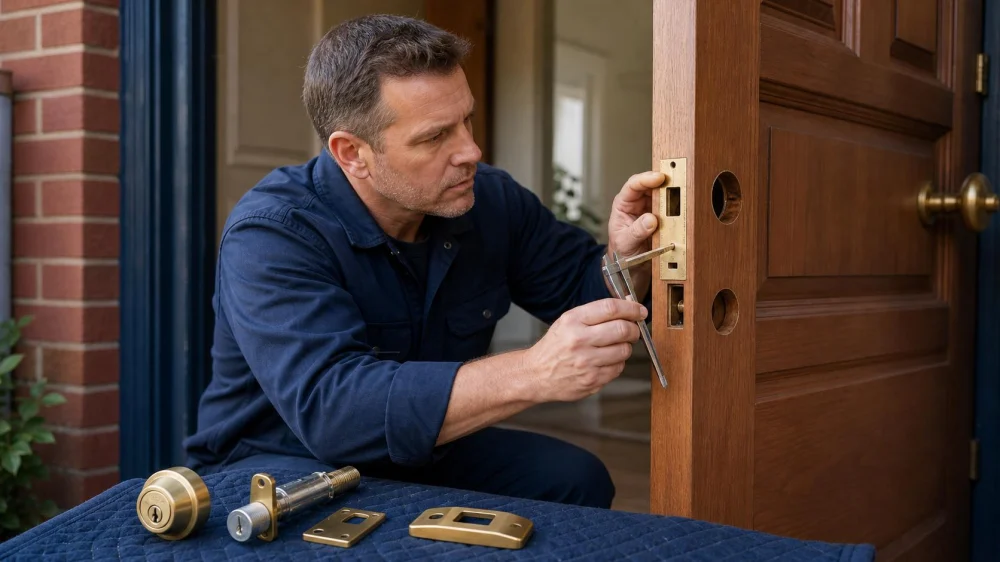
New Door Lock Installation: Confirm Backset, Door Prep, and Alignment First
On this page
Quick answer
Before buying or installing a new door lock, identify the door material and thickness, bore diameter, edge bore, backset, latch face shape, handing if relevant, strike dimensions, frame condition, and required function. Confirm fire, egress, accessibility, rental, insurance, historic-property, and homeowners-association rules that may apply.
A lock that fits the holes can still work poorly when the door sags, weatherstrip pushes it, the frame moves, or the latch and strike are misaligned. Correct door operation and choose compatible listed hardware before enlarging holes or driving new fasteners.

Secure Lock & Door, LLC
East LansingIngham CountyMichigan
911 E Grand River Ave, East Lansing, MI 48823, USA
Measure the existing door prep
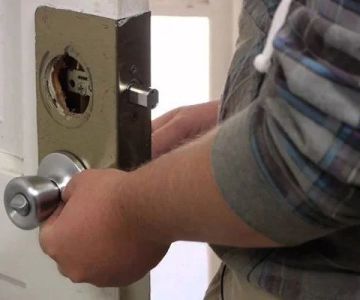
Photograph both door faces, edge, latch, strike, hinges, and frame. With the door open and supported, measure door thickness, center of the main bore to the door edge (backset), bore diameter, edge-hole size, center spacing for interconnected hardware, and strike size. Record units and use a straight reference rather than estimating from a curved trim edge.
Do not assume all residential locks share one backset or bore. Older, narrow-stile, metal, glass, multipoint, storm, security, and commercial doors may need specialized hardware. A locksmith can identify a nonstandard preparation without sacrificing original material.

Match function and door conditions
Decide whether the opening needs passage, privacy, keyed entry, deadbolt, storeroom, classroom, interconnected, electronic, or another function. Confirm which side must remain free for emergency exit. Choose finish and corrosion resistance for the environment, and verify compatibility with the door and frame materials.
For electronic hardware, plan power, battery access, mechanical override, credential ownership, privacy, network support, and what happens during an outage. For rentals or workplaces, obtain authorization and define who receives keys or codes. Never change a shared or controlled opening without the owner’s approval.
Verify latch and strike alignment
- Open and close the bare door gently to check rubbing, sag, bounce, and weatherstrip pressure.
- Confirm hinge screws and frame components are secure without over-tightening or stripping them.
- Mark where the latch naturally meets the strike; do not lift or push the door to fake alignment.
- Check that the latch fully extends and the deadbolt enters its pocket without scraping or binding.
- Inspect wood for splits and metal for distortion before relocating a strike.
- Use manufacturer-specified fasteners and reinforcement components for the door and frame.
- Have fire-rated, egress, storefront, glass, or structural alterations handled by qualified professionals.
Do not grind away a large opening to make a mismatched lock appear to fit. Excess removal can weaken the door, defeat listing requirements, expose sharp metal, or make a later repair harder.
Test and document the installation
Test every function with the door open first, then closed. From both sides, confirm smooth lever or knob return, latch engagement, deadbolt throw, key removal, thumbturn operation, code entry, auto-lock timing, and emergency exit. Never close a door until you have a working backup way to reopen it.
Count and label keys without exposing bitting or codes. Save the model, finish, keyway or credential system, receipts, installer, warranty, programming owner, battery type, and date. Photograph the completed door edge and strike. Remove temporary codes and return old hardware according to the owner’s instruction.
Pre-install checklist
- Ownership and modification authority confirmed
- Door material, thickness, bores, and backset measured
- Handing and lock function selected
- Egress, fire, access, and building rules checked
- Door swing, hinges, frame, and weatherstrip assessed
- Latch and strike alignment verified
- Electronic power and backup plan documented
- Open-door and closed-door tests completed
- Keys, codes, model, and warranty handed off securely
Limitations
This guide does not provide code approval or a cutting template. Hardware requirements vary by jurisdiction, occupancy, door listing, disability access, lease, and manufacturer. Fire doors, emergency exits, glass doors, electrified hardware, and access-control systems need qualified design and installation.
FAQ
What is backset?
It is the distance from the door edge to the centerline of the main lock bore. Measure the actual door and compare with the hardware instructions.
Can a binding deadbolt be fixed with a larger strike hole?
Not safely by default. First identify door sag, frame movement, weatherstrip pressure, and alignment.
Does lock handing always matter?
Some locks are reversible; others are handed. Confirm the product and door swing before ordering.
Should I keep the old lock?
Follow the owner’s decision, especially for rentals, historic hardware, warranty returns, and keyed systems.
When should a locksmith install it?
Use a qualified locksmith for nonstandard prep, damaged doors, controlled keys, multipoint or electrified locks, code-sensitive openings, or uncertain alignment.
Evidence notes
The reliable project evidence is the door-prep measurement sheet, manufacturer template and instructions, door and frame listing, applicable code or property approval, before-and-after photos, functional test record, key or credential handoff, and warranty. Product marketing alone does not prove fit or compliance.
Conclusion
A good lock installation begins before the package opens. Measure the full door preparation, match the function and rules, correct alignment without weakening the opening, test from both sides, and preserve a secure record of keys, codes, and hardware.


 Minute Key0.0 (0 reviews)
 KeyMe Locksmiths0.0 (0 reviews)
 Minute Key0.0 (0 reviews)
 KeyMe Locksmiths4.0 (218 reviews)
 KeyMe Locksmiths4.0 (29 reviews)
 KeyMe Locksmiths4.0 (15 reviews)
 How to Find a Reliable Locksmith for Safe Installation
 The Importance of Installing a High-Security Lock on Your Back Door | Locksmith Finder
 How to Secure Your Garage Door Against Common Break-In Methods
 Locksmith Advice for Handling Lockouts Without Causing Damage
 Deadbolt Works Open but Binds When the Door Is Closed
 How to Secure Your Basement Windows Against Break-Ins