
Loose Door Knob or Lever? Safe Checks Before Repair
On this page
Quick answer
Hold the door open and determine whether the knob or lever, round trim plate, latch, or entire lock assembly is moving. Check only visible fasteners with the correct hand tool and follow the hardware instructions. Stop if the handle may detach, the latch does not retract, the lock binds, or the exterior door cannot secure; those conditions need prompt repair.
This guide is for authorized inspection of ordinary residential hardware in the United States. It does not cover removing concealed security parts, defeating a lock, or working on fire-rated, access-control, or panic-exit hardware.

Identify what feels loose
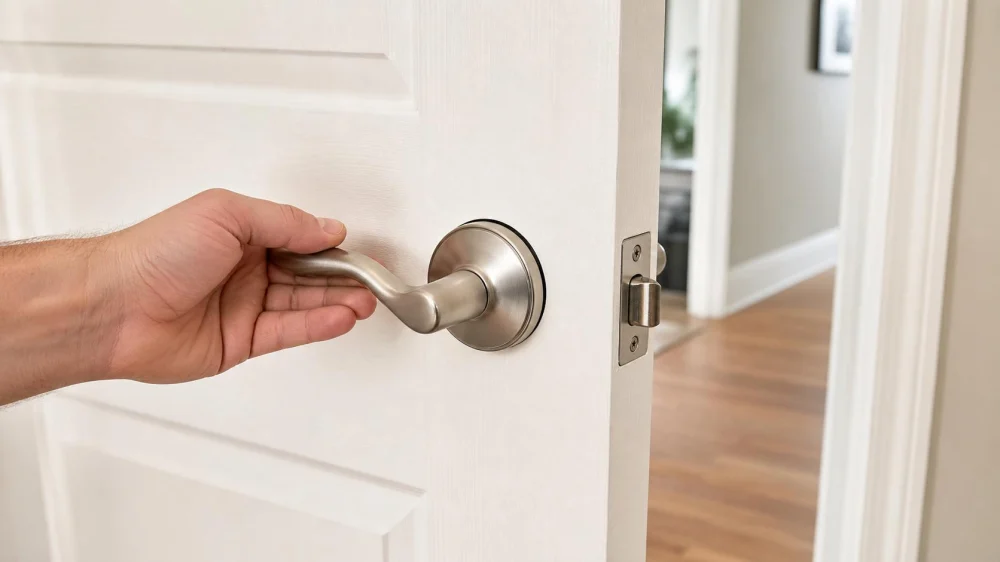
“Loose handle” can describe several different movements. The grip may wobble on its spindle, a lever may droop, the round or rectangular trim may rotate against the door, or the complete assembly may shift from side to side. Each pattern points to different hardware.
Check both sides without taking anything apart. Ask another authorized adult to watch the opposite trim while you gently move the handle. If both sides shift together, the through-fastening system or door material may be involved. If only the grip moves, a retaining fastener or internal component may be the issue.
Do not keep testing with force. Repeated pulling can enlarge screw holes, bend a spindle, damage the latch, or cause the handle to separate at an inconvenient time.
Warning signs to notice
- The knob or lever pulls away from the door.
- The trim plate rotates, rattles, or exposes an increasing gap.
- The handle sags instead of returning to its normal position.
- The latch retracts only partway or stays inside the door edge.
- Turning the handle produces grinding, scraping, or clicking.
- Visible screws repeatedly back out after careful tightening.
- The door surface is cracked, crushed, soft, or enlarged around the hardware.
A loose handle can exist alongside door misalignment. If the latch binds only when the door is closed, inspect the door and strike interaction rather than assuming the handle alone is responsible.
A safe inspection sequence
- Open the door. Keep it from closing during the inspection and make sure another exit remains available.
- Support the hardware. Hold the knob or lever gently without hanging weight from it.
- Locate the movement. Move the grip slightly up, down, inward, and outward while watching the trim and opposite side.
- Operate the latch. Turn or press the handle slowly and confirm that the latch retracts and returns while the door is open.
- Look for visible fasteners. Note screw heads, a small manufacturer-provided retaining fastener, or trim gaps. Do not pry off a concealed cover to search.
- Inspect the door material. Look for splitting, crushed fibers, loose metal skin, or an oversized bore around the trim.
- Photograph the model and condition. Capture the whole set, door edge, visible fasteners, and any damage for parts identification.
Check visible fasteners and trim
If the correct fastener is fully visible and the door material is sound, use a properly fitting manual screwdriver or hex key specified by the manufacturer. Support both sides and tighten evenly until snug. Stop if a screw spins, binds, sits crooked, or pulls the trim into the door.
Do not use an oversized power driver. Excess torque can strip threads, crack trim, crush a hollow door, or distort the lock so the latch no longer moves freely. Thread-locking compounds, glue, tape, and improvised shims should not be added unless the manufacturer specifically allows them.
After any limited adjustment, operate the handle repeatedly with the door open, then close it gently and verify that the latch and lock work normally. An exterior door must finish the check fully secure.
Tighten, replace, or call a locksmith?
Limited tightening may be enough
A recently installed handle with an accessible fastener that has simply loosened may need only careful retightening according to its instructions. Monitor it; repeated loosening suggests another cause.
Replacement may be appropriate
Broken return springs, worn spindles, cracked trim, missing proprietary parts, or hardware that no longer holds adjustment may justify replacement. Choose compatible hardware for the door thickness, bore, backset, function, accessibility needs, and exposure.
Call a locksmith
Use a verified locksmith when concealed parts are involved, the key cylinder moves, the latch fails, the door cannot lock, parts are unfamiliar, or the opening has security damage. Commercial, multi-unit, fire-rated, and access-control doors require appropriate qualified service.
Prevent repeat loosening
- Use the handle to operate the latch, not as a grab bar or door stop.
- Correct door rubbing that makes users pull or lift the handle.
- Keep door closers and weatherstripping from creating excessive resistance.
- Use the fasteners and mounting parts specified for the hardware.
- Recheck a new installation after normal use without overtightening.
- Teach household members to report wobble before the handle separates.
Loose handle checklist
- The door is open and controlled during inspection.
- The exact moving part has been identified.
- The latch retracts and returns with the door open.
- Visible fasteners are present, straight, and not stripped.
- The trim sits flat without crushing the door.
- The door material shows no cracks or soft areas.
- No grinding, sticking, or key-cylinder movement occurs.
- The door latches and locks normally after the check.
Limitations and safety notes
A surface check cannot identify every broken spring, spindle, chassis, or concealed fastener. Hardware construction varies widely. Use the exact manufacturer's instructions or qualified service rather than assuming one disassembly method fits every lock.
Do not remove hardware from a door that may close and lock unexpectedly. Address an exterior door that will not secure promptly. Fire doors, emergency exits, rental units, and shared-building entrances may have inspection, authorization, and code requirements.
Frequently asked questions
Why does my lever droop?
A return spring or internal chassis may be worn, or the mounting may be loose. The exact cause depends on the hardware design.
Can I glue a loose knob in place?
No. Adhesive can obstruct service, contaminate moving parts, and hide a failing retainer. Use specified parts or replace the hardware.
Why do the screws keep loosening?
Door vibration, misalignment, damaged threads, missing mounting parts, or improper installation may be involved. Repeated tightening without diagnosis can cause more damage.
Should the trim plate move at all?
It should generally sit stable against the door while allowing the handle to operate freely. Movement that grows or affects the latch needs correction.
Can a loose handle lock me in a room?
It can fail to retract the latch. Stop using an unreliable handle, keep an alternate exit, and arrange repair before the condition worsens.
Sources and evidence notes
The guidance reflects common hardware-maintenance practice: identify the moving component, test with the door open, use correctly fitting hand tools, avoid overtightening, and verify normal latching and locking afterward.
No universal screw location, tool size, repair method, or replacement product is assumed. The specific hardware instructions and door requirements determine the work.
Next steps
With the door open, record whether movement comes from the grip, trim, latch, or entire assembly. Photograph the hardware and any visible fastener. If one accessible screw is clearly loose, follow the product instructions for a limited adjustment; otherwise give the observations to a verified locksmith before the handle fails.


 KeyMe Locksmiths4.0 (105 reviews)
 Locks Around the Clock4.0 (116 reviews)
 Minute Key0.0 (0 reviews)
 Hoernel Key Shop Inc4.0 (123 reviews)
 KeyMe Locksmiths2.0 (3 reviews)
 KeyMe Locksmiths4.0 (48 reviews)
 Cost Guide for Replacing Car Ignition Near You
 What to Do If Your House Key Is Stolen and You Feel Unsafe
 The Benefits of Installing a Smart Lock with Mobile Access
 Locksmith Near Me in El Paso TX Affordable Lock Repair Guide
 Locksmith Advice: How to Maintain Your Locks Year-Round for Optimal Security
 How Do I Contact a 24 Hour Locksmith Near Me Quickly in Emergencies